There are two types of threads we can create in SOLIDWORKS: physical and cosmetic.
A physical thread creates a lot of geometry. So if your model requires a thread, then we recommend adding threads as cosmetic threads to maximise performance.
We typically recommend only adding physical threads to configurations of the model that will be 3D printed or if you need to render the physical geometry in SOLIDWORKS Visualize.
Did you know you can also render cosmetic threads realistically in SOLIDWORKS Visualize?
HOW TO CREATE COSMETIC THREADS IN SOLIDWORKS

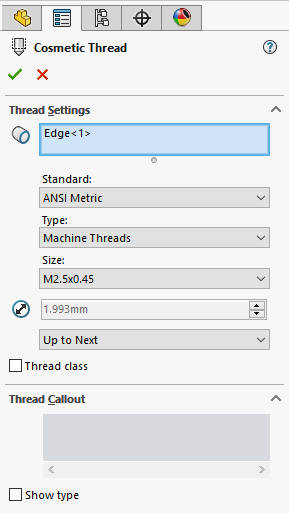
Cosmetic Thread is a simple and effective tool to create threads.
The easiest way to access this command is to tap the S key on your keyboard and start typing to search for the command, but it can be found under Tools > Annotations > Cosmetic Thread.
Here, you need one circular edge selection as a minimum – this is the edge you want the thread to start from.
We can then set the standard, which will auto-fill the Thread Callout section for use in any drawings.
When confirmed, this new feature will be absorbed under the feature that the edge you selected belongs to.
Your graphics view will just show a visual representation of a thread. If you can’t see it… go to Document Properties and tick to show Shaded cosmetic threads.

But what if you want a tapered cosmetic thread?

Simply select the circular edge of the minor diameter (the smallest end of the taper) as necessary, and the cosmetic thread will still function correctly.
HOW TO CREATE A PHYSICAL THREAD IN SOLIDWORKS

As we mentioned, physical threads should be used sparingly, and never on hardware (represent threads on hardware with cosmetic threads) that will be frequently inserted into assemblies.
To create physical threads, we have the Thread tool under the Hole Wizard drop down on the Features tab.
A minimum of two selection boxes need to be populated in the property manager for a successful thread.
Thread Location requires a cylindrical edge from where we want the thread to start, while the End Condition is where the thread will end, and we can specify the thread type and method.
A good tip here is to set the Preview Options to Shaded Preview so you can clearly visualize how your thread will look.
When the property manager is confirmed, you will have a new feature at the end of your SOLIDWORKS Feature Tree.
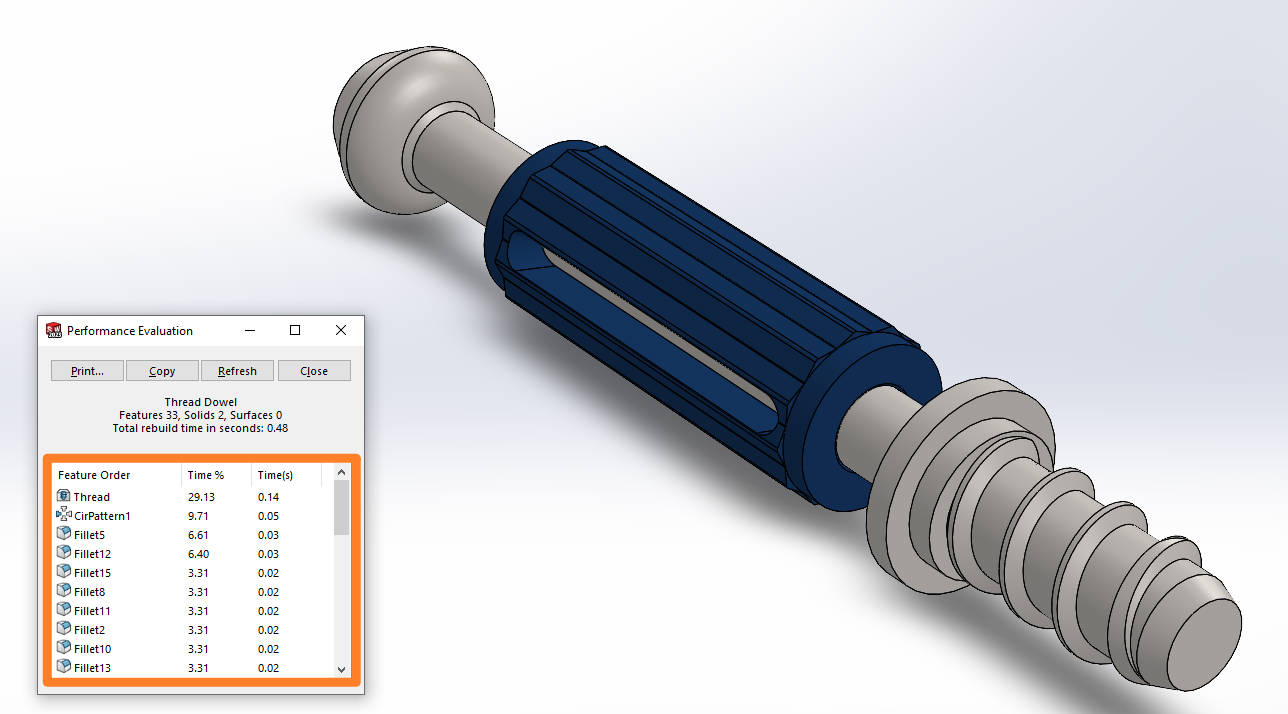
This method creates a physical thread and is a relatively complex feature when compounded on top of or alongside longer feature trees.
We can check the effect of this using Performance Evaluation under the Evaluate tab.
HOW TO CREATE A TAPERED THREAD IN SOLIDWORKS
It’s important to note that the thread tool only works with cylindrical faces. So what if we need a tapering thread?
Well, we’ll have to revert to the manual method of creating threads by creating a tapered helix and sweeping a sketched profile around it.
To show you exactly how it’s done, we’ve pulled together this short tutorial video.
Take the Next Steps...
When using the Thread tool, there are a load of preset thread profiles available to use.
If you find that the thread profile you want isn’t listed, then you can create custom thread profiles in SOLIDWORKS. These need to be created in their own part file and saved to a specified location.
Watch this short tutorial to learn how to create custom thread profiles and improve your SOLIDWORKS skills.